Your home, remembered.
Everything you need to know about using Meu Cantinho — your calm, private diary for your home.
What is Meu Cantinho?
Meu Cantinho is a private home diary for your phone. It's where you log what needs attention, the ideas you have for a place, what's been fixed, who's responsible, and what you've spent — across all the properties in your life.
Think of it less like a ticket system and more like a journal. Your home tells a story over time. Meu Cantinho is where that story lives.
Capture in seconds
Take a photo, add a note. A repair, an idea, a detail worth keeping — saved with the date and room.
Delegate clearly
Assign issues to your husband, handyman, or gardener. See what each person has open.
Track spending
Log costs on each repair. Know how much you've spent by month, category, or property.
Share professionally
Send a formatted brief to any contractor via WhatsApp — photo, description, and history included.
Your first 5 minutes
Look around your home
Walk through one room. Spot anything that needs attention — or worth remembering: a dripping faucet, a cracked tile, an idea for the space.
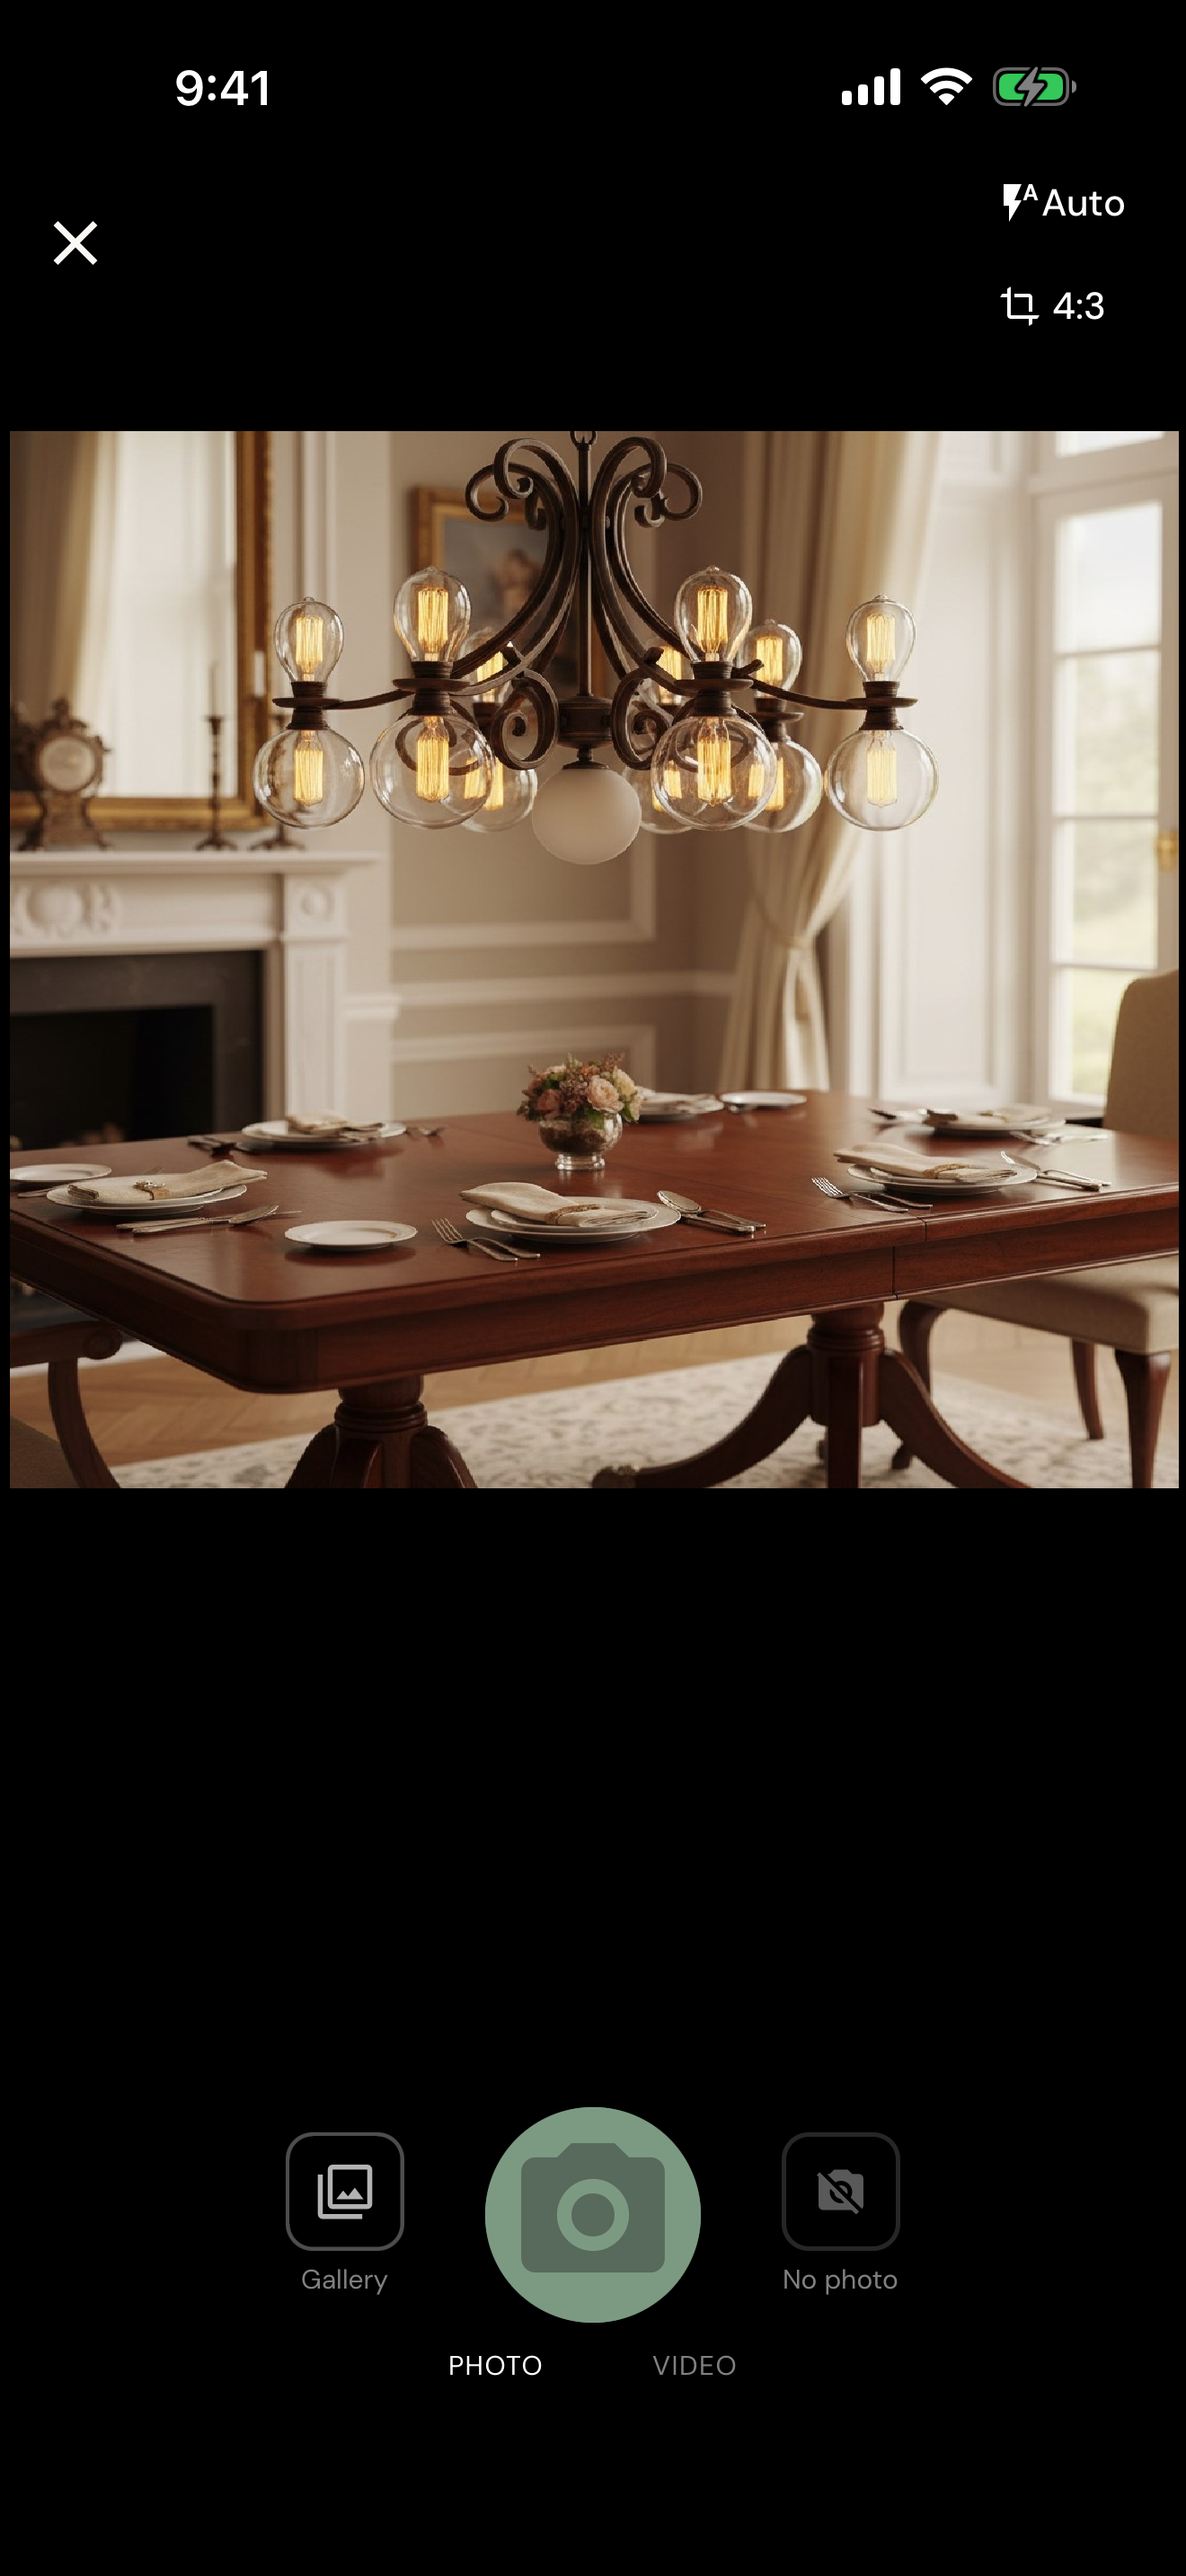
Tap the green + button
The large button at the bottom center of the screen opens the capture flow. Your camera opens immediately.
Take a photo or video
Point at the issue and tap to take a photo, or switch to video mode for a short clip. You can also tap Gallery to choose an existing image from your Camera Roll.
Add a title and save
Give it a name ("Leaking faucet in bathroom"), optionally choose an area and assignee, then tap Save. Done.
Keep going
Walk to the next issue and repeat. A 20-minute walkthrough can produce a complete property log.
Tip: Nothing is required at capture time — even the photo. You can tap "No photo" to skip and add the photo later. Capture first, organize after.
Demo data
When you first open Meu Cantinho, it includes a sample property called My Demo Home with 16 pre-loaded items, photos, areas, and assignees. This is so you can explore every feature immediately without setting anything up.
When you're ready to start with your own property, tap the ☰ menu → Delete demo data. This removes all sample items and photos permanently.
Note: Deleting demo data is permanent. If you've added your own items to the demo property before deleting, those will be removed too. Create a new property first if you want to keep your own items.
Capturing an issue
Capturing is the central action of the app — a repair, an improvement idea, or a detail worth remembering. It's designed to take under 30 seconds so you can walk through an entire property and log everything without slowing down.
The capture form
| Field | Required | Notes |
|---|---|---|
| Photo | Optional | Strongly recommended. Can also be added later. Tap "No photo" to skip. |
| Video | Optional | Switch the camera to video mode to record a clip (up to 15 seconds) in place of, or alongside, a photo. |
| Title | Optional | A short name for the issue. Can be filled in during later triage. |
| Area | Optional | Which room or zone this issue belongs to. |
| Assignee | Optional | Who is responsible for addressing it. |
| Status | Auto | New items start as "To Do" automatically. |
| Target date | Optional | When you want it resolved by. |
| Tags | Optional | Categories like Plumbing, Electrical, Painting. |
| Voice note | Optional | Record a short voice description (up to 30 seconds) instead of typing. |
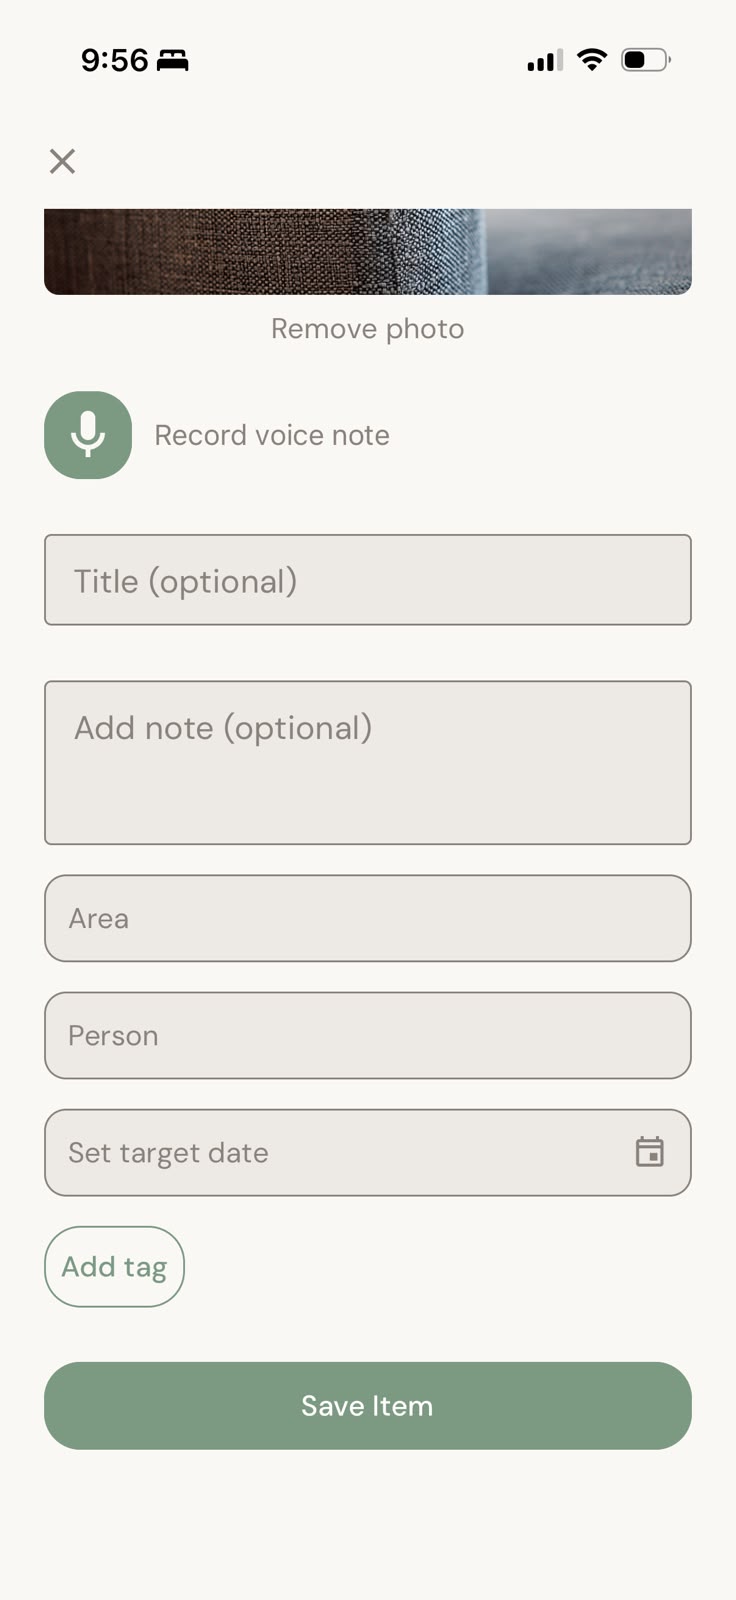
Photo tips
Photos are compressed automatically — they won't fill up your phone. Take photos in good light and get close to the issue so the detail is visible when you share.
Voice notes
Tap the microphone to record up to 30 seconds of audio. Voice notes are stored on your device alongside the item and are never uploaded.
Annotations
After taking a photo, tap the annotation icon to draw freehand strokes on the image — pick a color and line thickness, then sketch over the trouble spot. Annotations are especially useful before sharing — they highlight the exact problem area so the contractor doesn't need to guess.
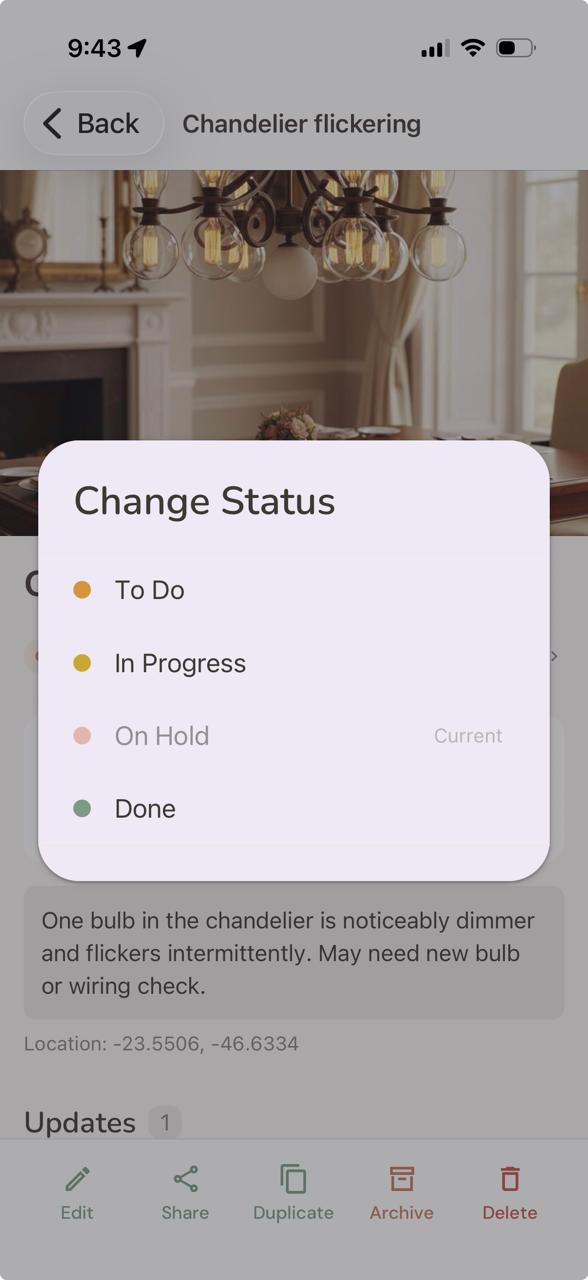
Item status
Every issue moves through a status lifecycle as it progresses from noticed to resolved.
| Status | Meaning |
|---|---|
| To Do | Noticed and logged, not yet started. |
| In Progress | Someone is actively working on it. |
| On Hold | Paused — waiting for a part, quote, or contractor availability. |
| Done | Fixed. Moves out of the active list and into resolved history. |
To change the status of an item, open it and tap the status chip at the top, then pick the new status.
Archiving vs. deleting
Separately from status, any item can be archived — swipe left on the item, or use the bulk toolbar, to move it out of your active lists while keeping the full history available under the Archived filter. Deleting an item is different: it is permanent, and removes the item, its photos, voice notes, and timeline from your device.
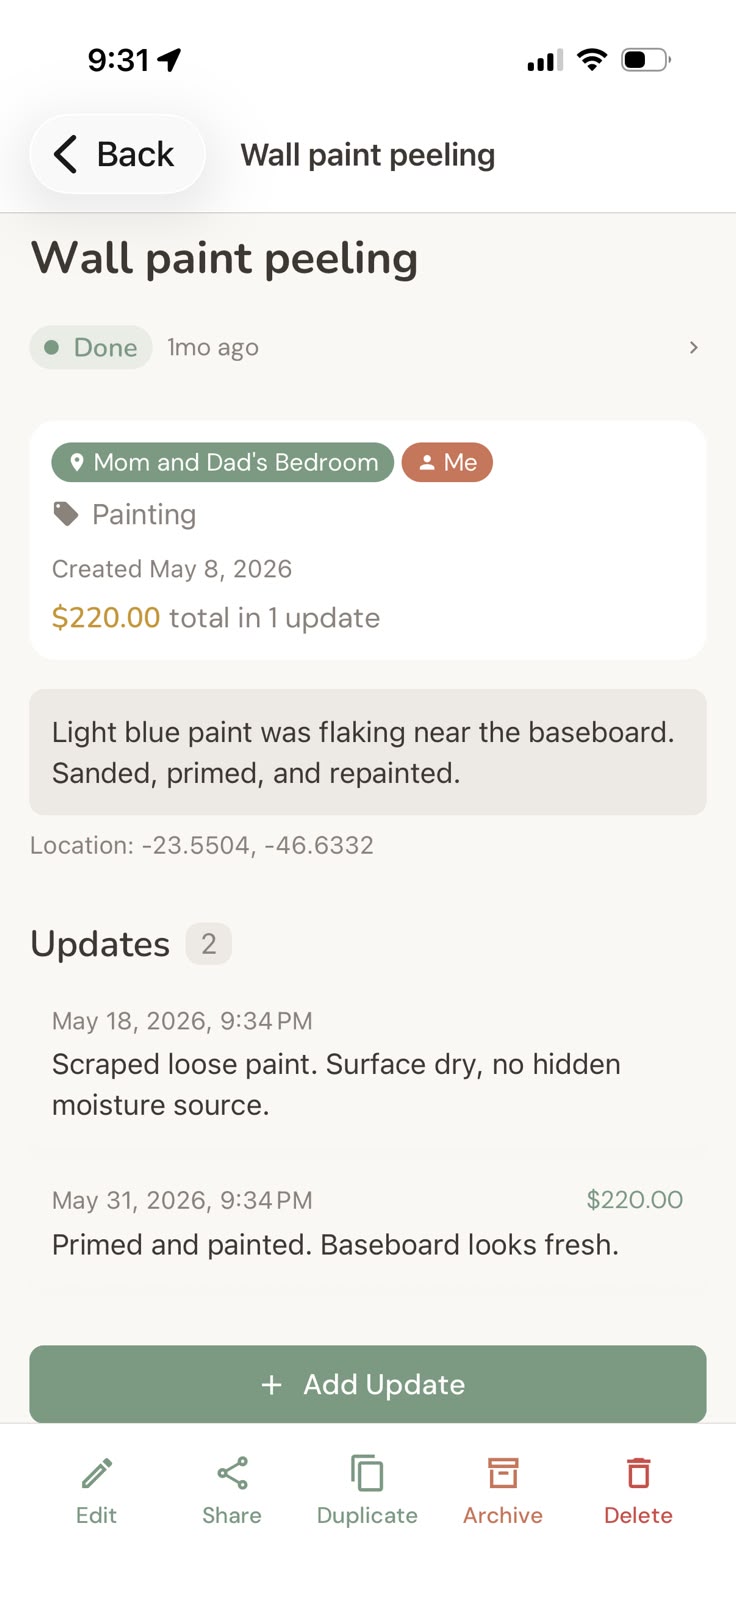
Adding updates
An update is a record of something that happened — a quote received, a repair attempted, a contractor visit, or a new photo of the problem. Each update keeps its own note, optional photo, optional voice memo, and optional cost.
Over time, an item's update timeline becomes the full story of that issue. "First noticed in March. Quoted in April. Repaired in May."
Editing or removing an update
Tap any update in the timeline to open it. From there you can edit the note or photo, or delete the update outright. Deleting an update is permanent — the entry is removed from the timeline.
Adding a cost to an update
Any update can include a cost amount. This is how you track what you've spent — log the cost when the contractor sends you the invoice, and it flows automatically into your property's financial summary.
People & assignees
Assignees are the people responsible for your issues — your husband, a handyman, a gardener, a property manager, or yourself.
You create assignees in ☰ menu → Vocabulary → People. Once created, they appear as options whenever you capture or edit an item. People are global — the same handyman or contractor can be reused across all your properties.
The People tab
The People tab (person icon in the bottom navigation) shows every assignee and their current workload: how many items they have open, how old the oldest item is, and which item is most overdue.
Tapping an assignee opens their filtered list — useful before a contractor visit when you want to share everything they need in one go.
Tip: Before your handyman arrives, open People → tap their name → this shows exactly what they have open. Use the Share button from this view to send them a combined briefing.
Areas & rooms
Areas are the rooms or zones within a property — Kitchen, Bathroom, Garden, Garage, and so on. Assigning an area to an issue helps you filter by room and see the issue in context on the floor plan view.
Manage your areas in ☰ menu → Vocabulary → Areas. Each property has its own list — add, rename, or reorder areas at any time.
Tags & categories
Tags classify the type of issue — Plumbing, Electrical, Painting, Structure, Garden, and so on. They're used to group costs in the Investments view and to filter your list by category.
Meu Cantinho comes with a suggested set of tags. You can edit, add, or remove any of them in ☰ menu → Vocabulary → Tags. Tags are shared across all your properties, and an issue can have multiple tags.
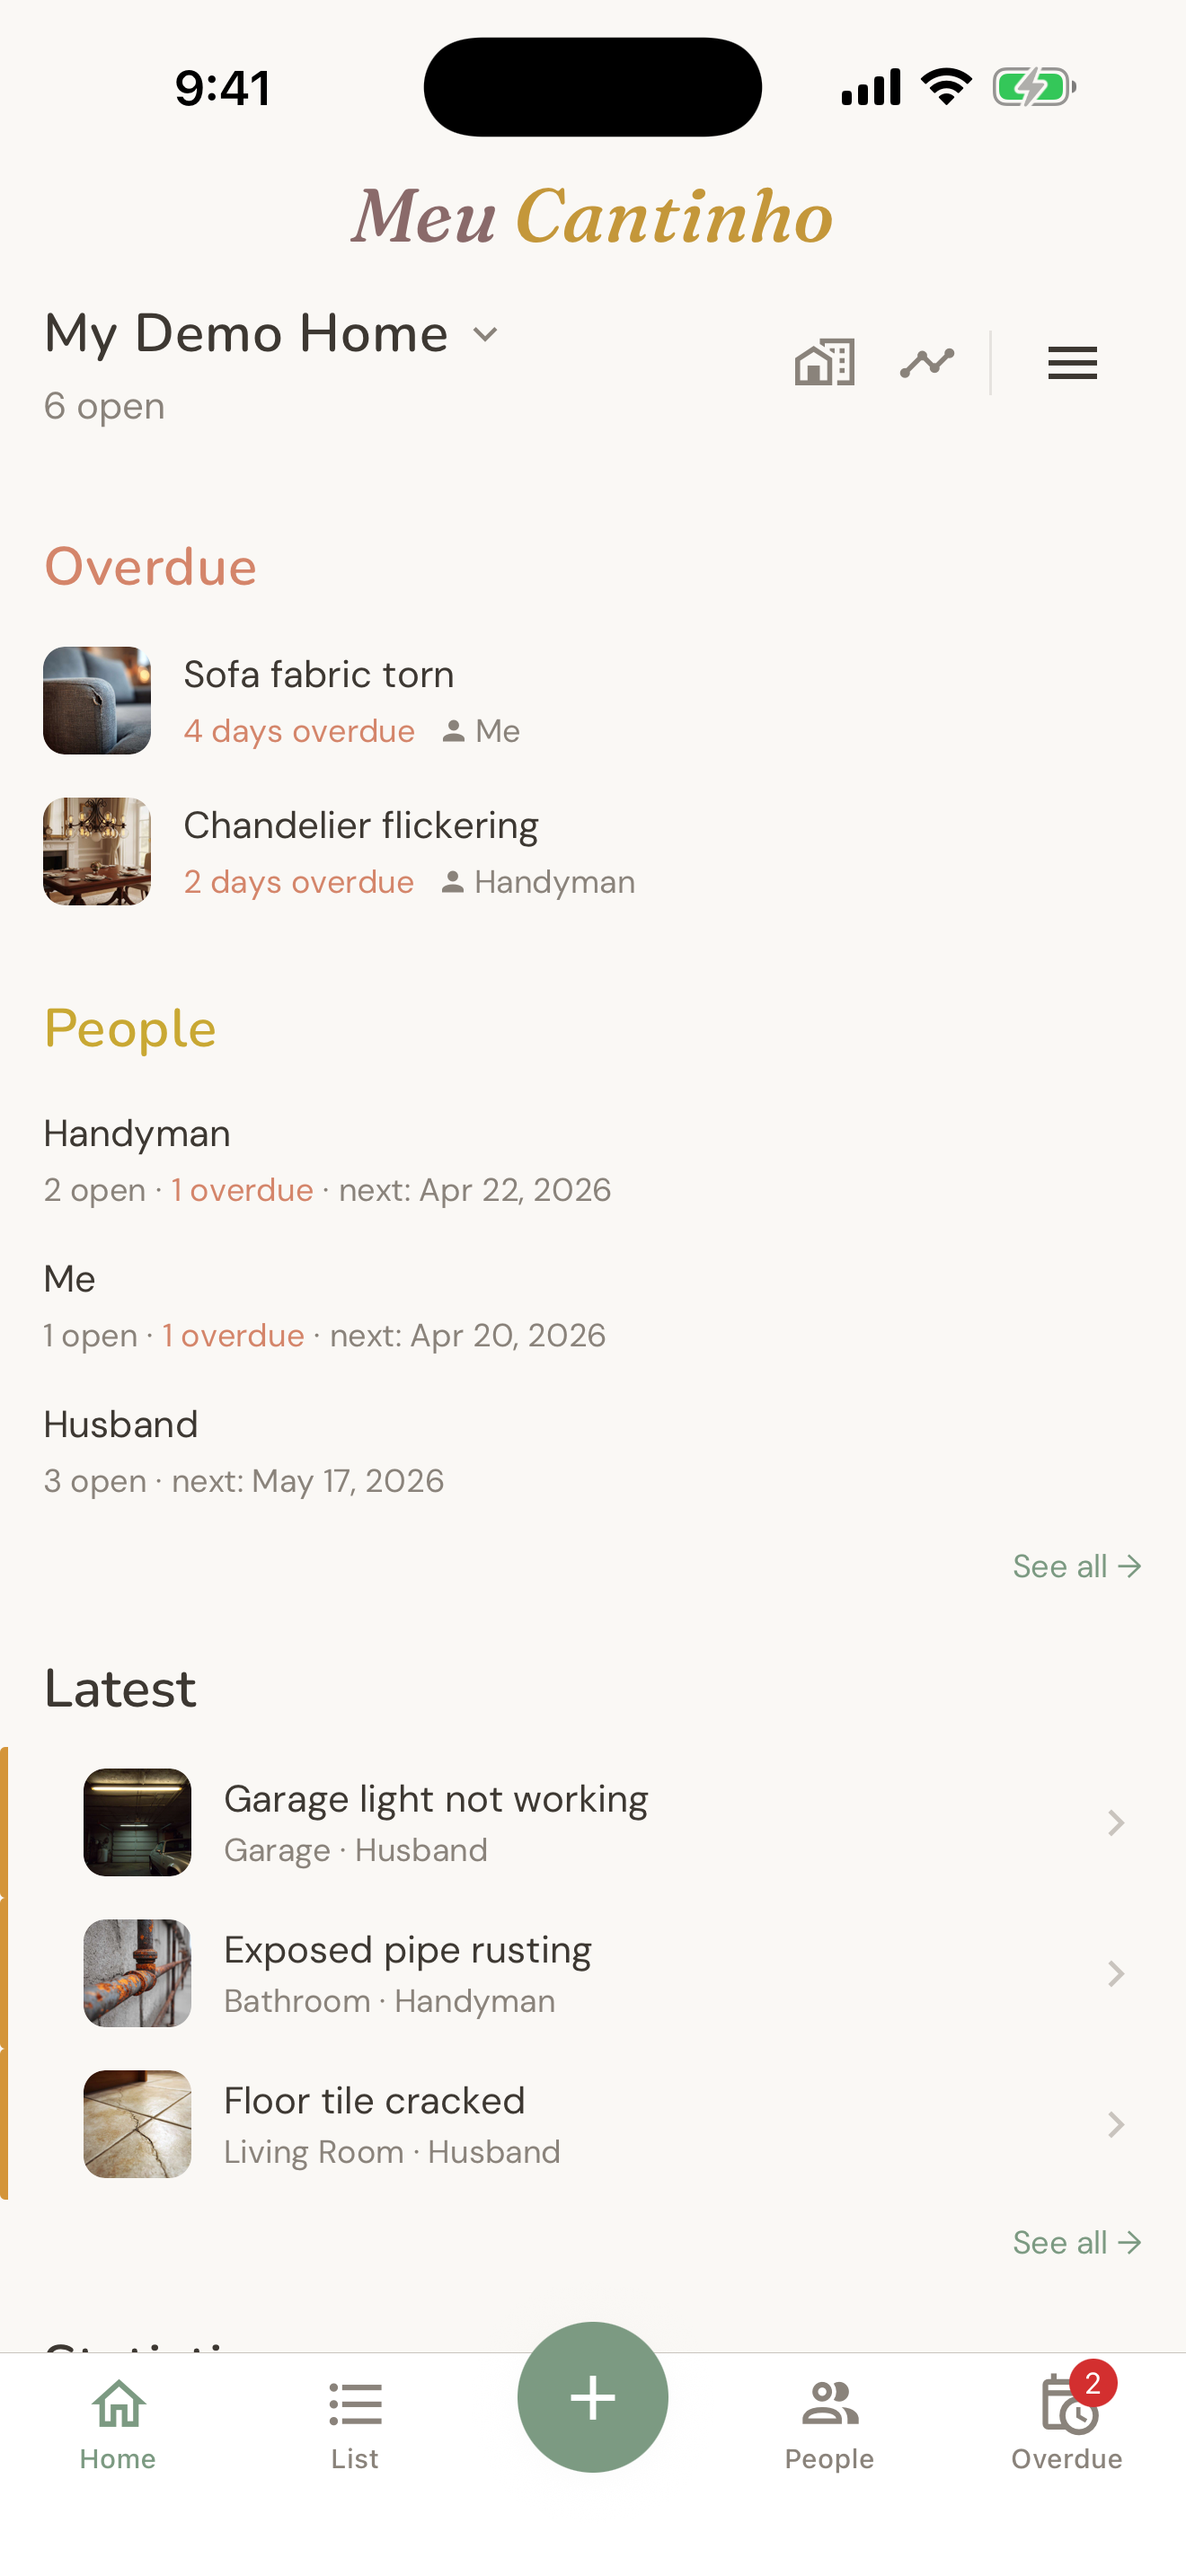
Home screen
The home screen is your morning briefing. It surfaces what needs your attention today without requiring you to search or scroll through everything.
Sections on the home screen
| Section | Shows |
|---|---|
| Overdue | Items whose target date has passed. Shown first when present — these need action now. |
| Due this week | Items with target dates in the next 7 days. |
| Needs triage | Recent captures that don't yet have an area, assignee, or target date — a nudge to organize what you logged on the go. |
| People | Your assignees and their workload summary. Overdue items highlighted. |
| Quick captures | Photos you saved without a title yet. A reminder to give them a name when you have a moment. |
| This month | A monthly progress summary — how many items came in, how many got resolved, and how much you spent. |
| Latest | A strip at the bottom showing the most recently captured items, regardless of status. |
Sections only appear when they have something to show, so the home screen stays calm. Each section displays up to 3 items with a See all → link to view the full filtered list.
The property selector
The property name and item count are shown at the top of the home screen. Tap the dropdown arrow to switch to a different property.
Header icons
The two icons next to the property name take you to the Property Detail view (building icon) and the Statistics view (chart icon), where you'll also find the Investments summary.
List view
The List tab shows all items for the current property, grouped by the date they were captured. This creates a natural "session" view — everything logged during a walkthrough appears together.
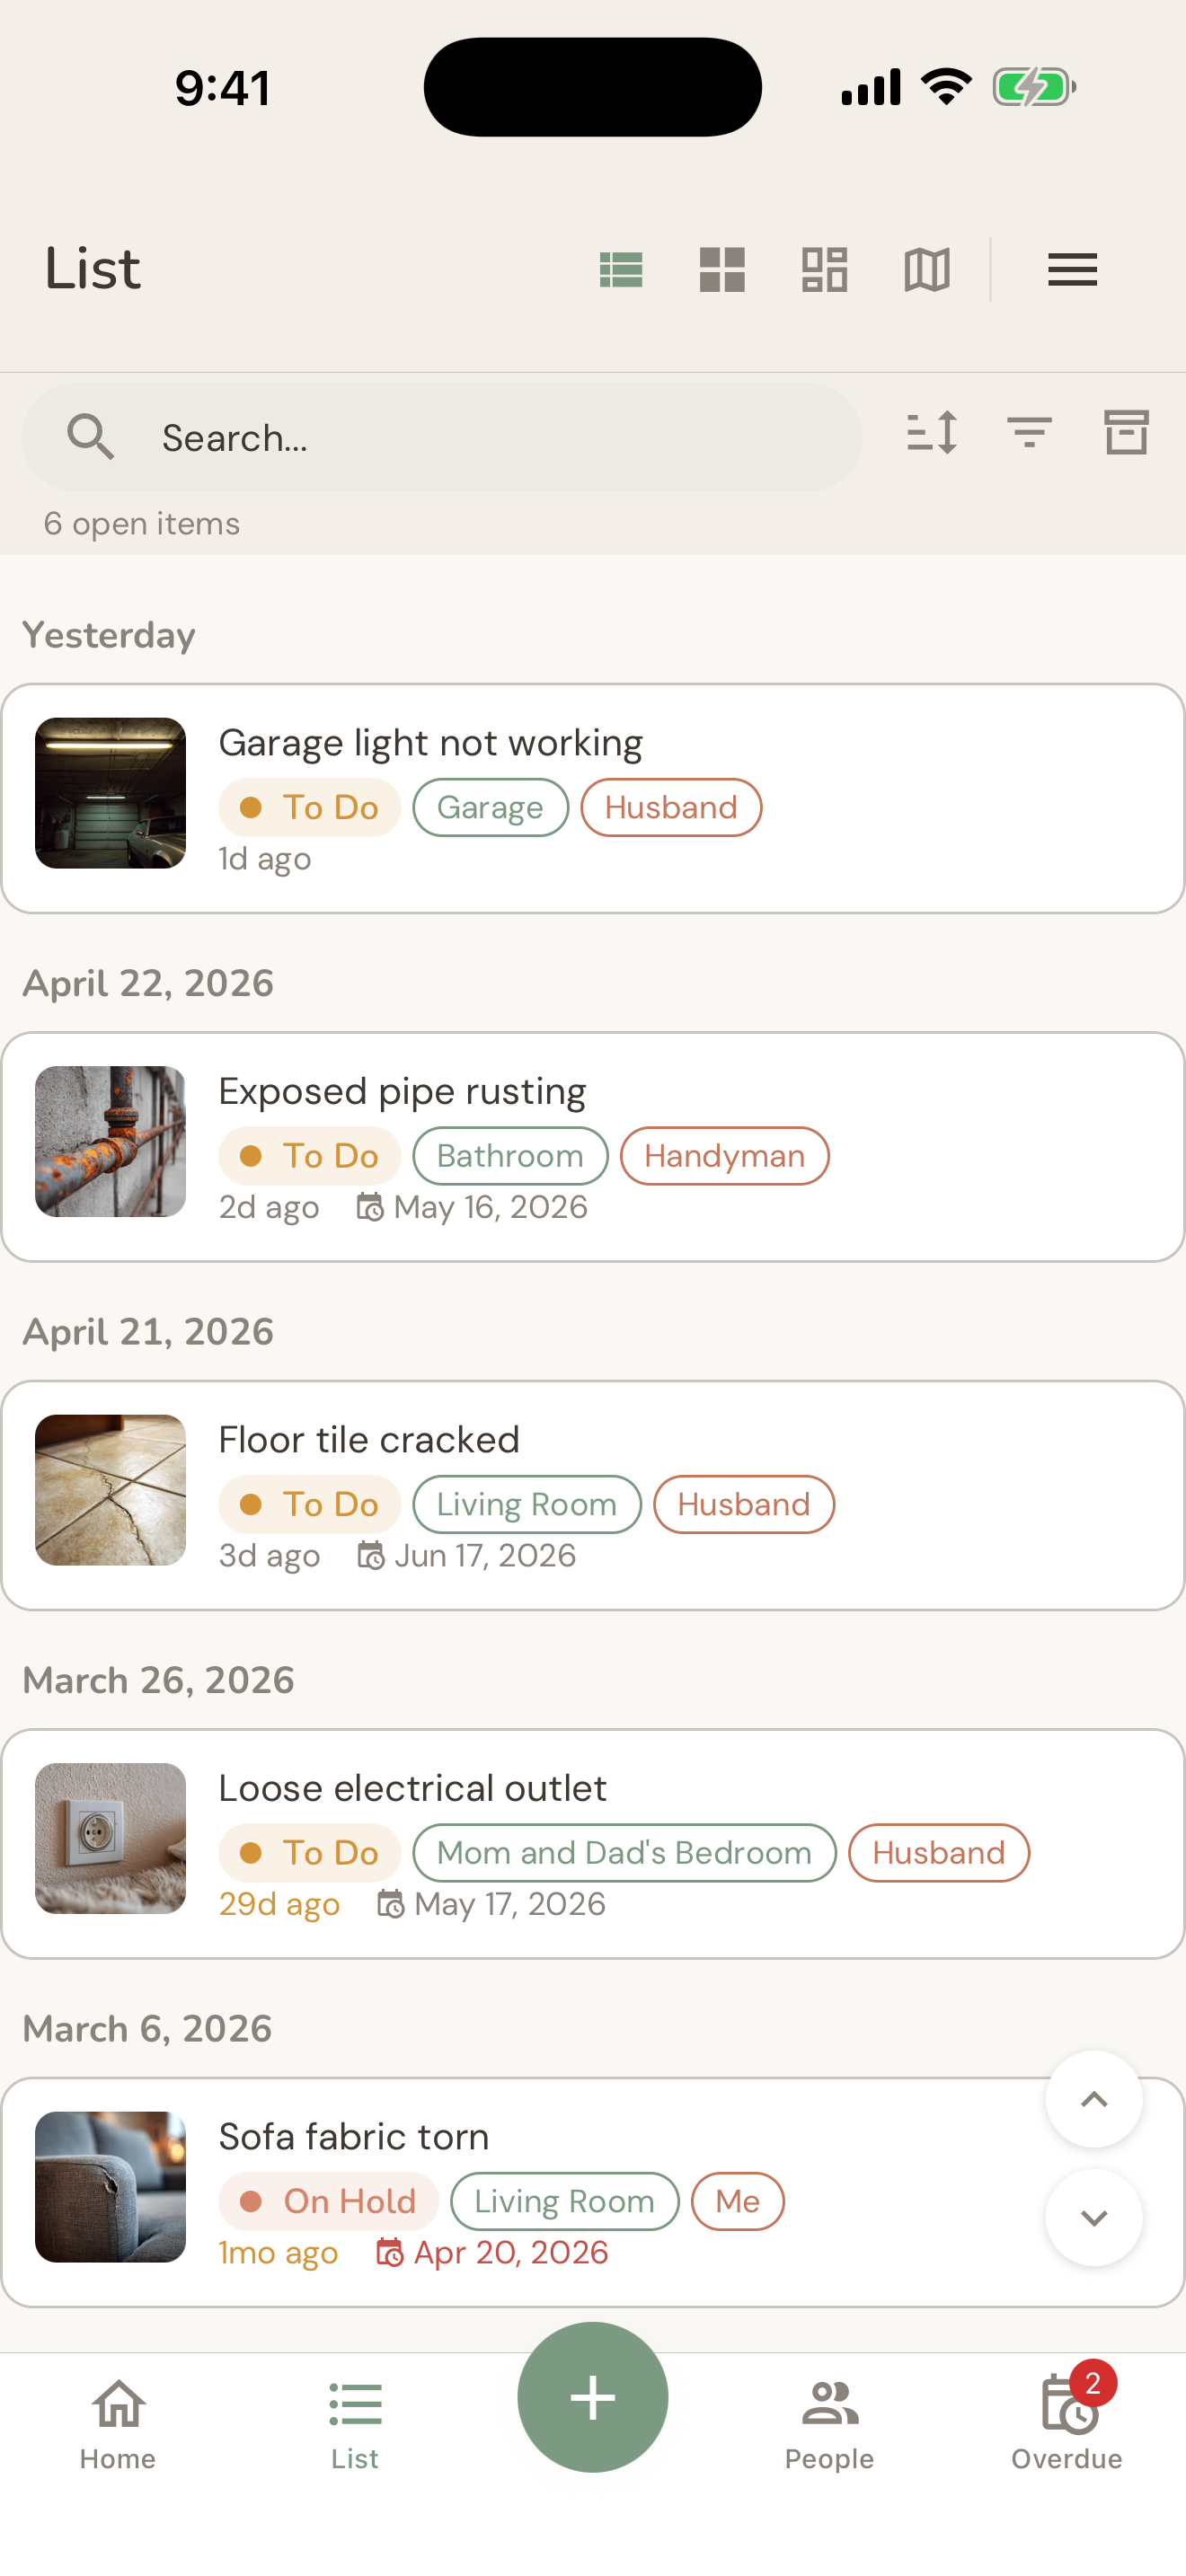
Sorting and filtering
Use the icons to the right of the search bar to sort, filter, or switch to archived items. You can filter by status, assignee, area, tag, or date range.
Search
The search bar filters by title and notes in real time, within the property you're currently viewing.
Swipe actions
Swipe left on any item to reveal quick actions: Archive and Delete.
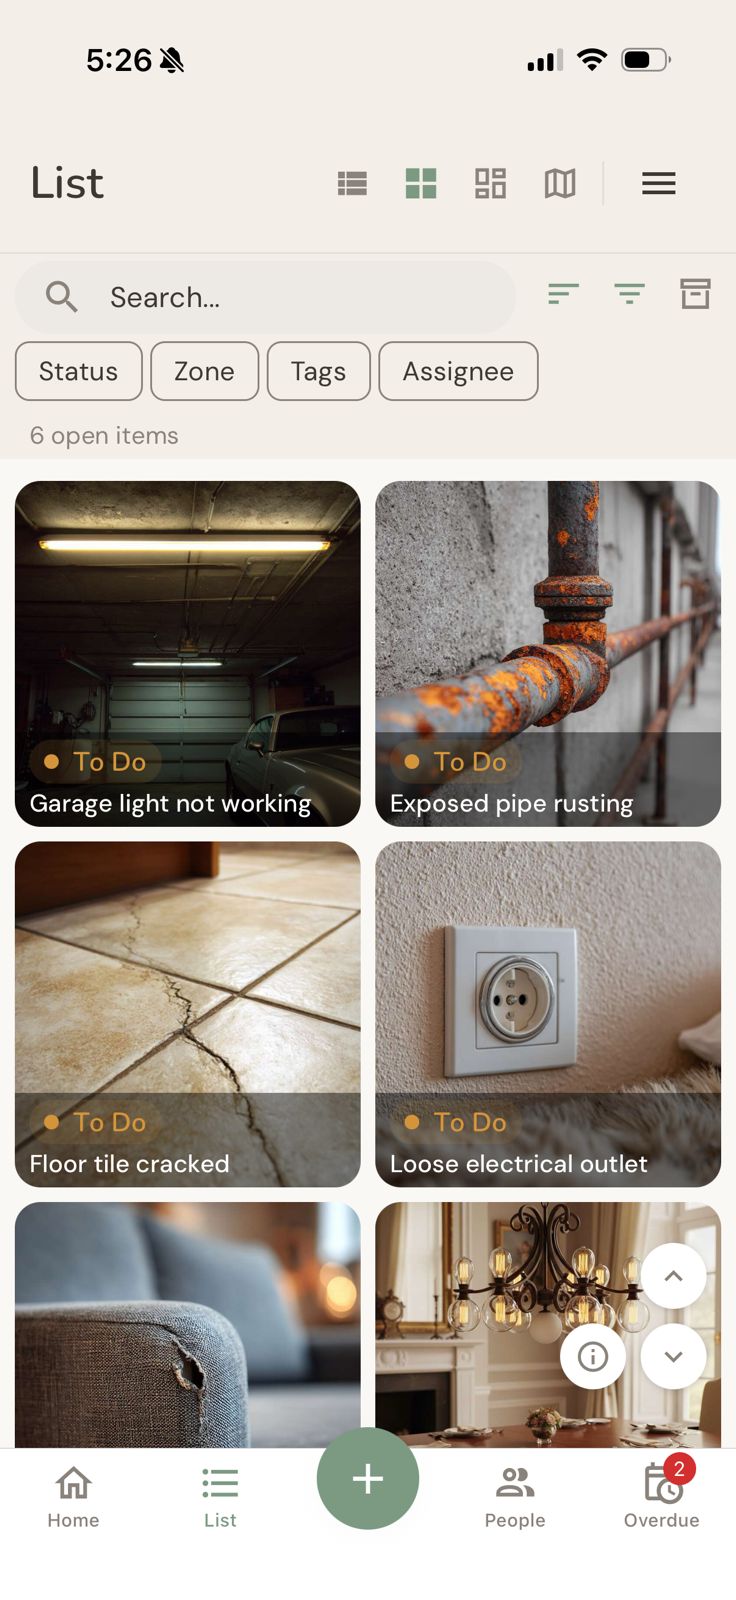
Photo grid
Switch to the grid view using the second icon in the List header. Each item is shown as a large photo tile with its title and status. This view is best for quickly scanning what you have visually.
Floor plan view
The floor plan view lets you see your items plotted on a schematic of your property. Each area shows a count bubble indicating how many open items it contains. Tap a bubble to see items in that area.
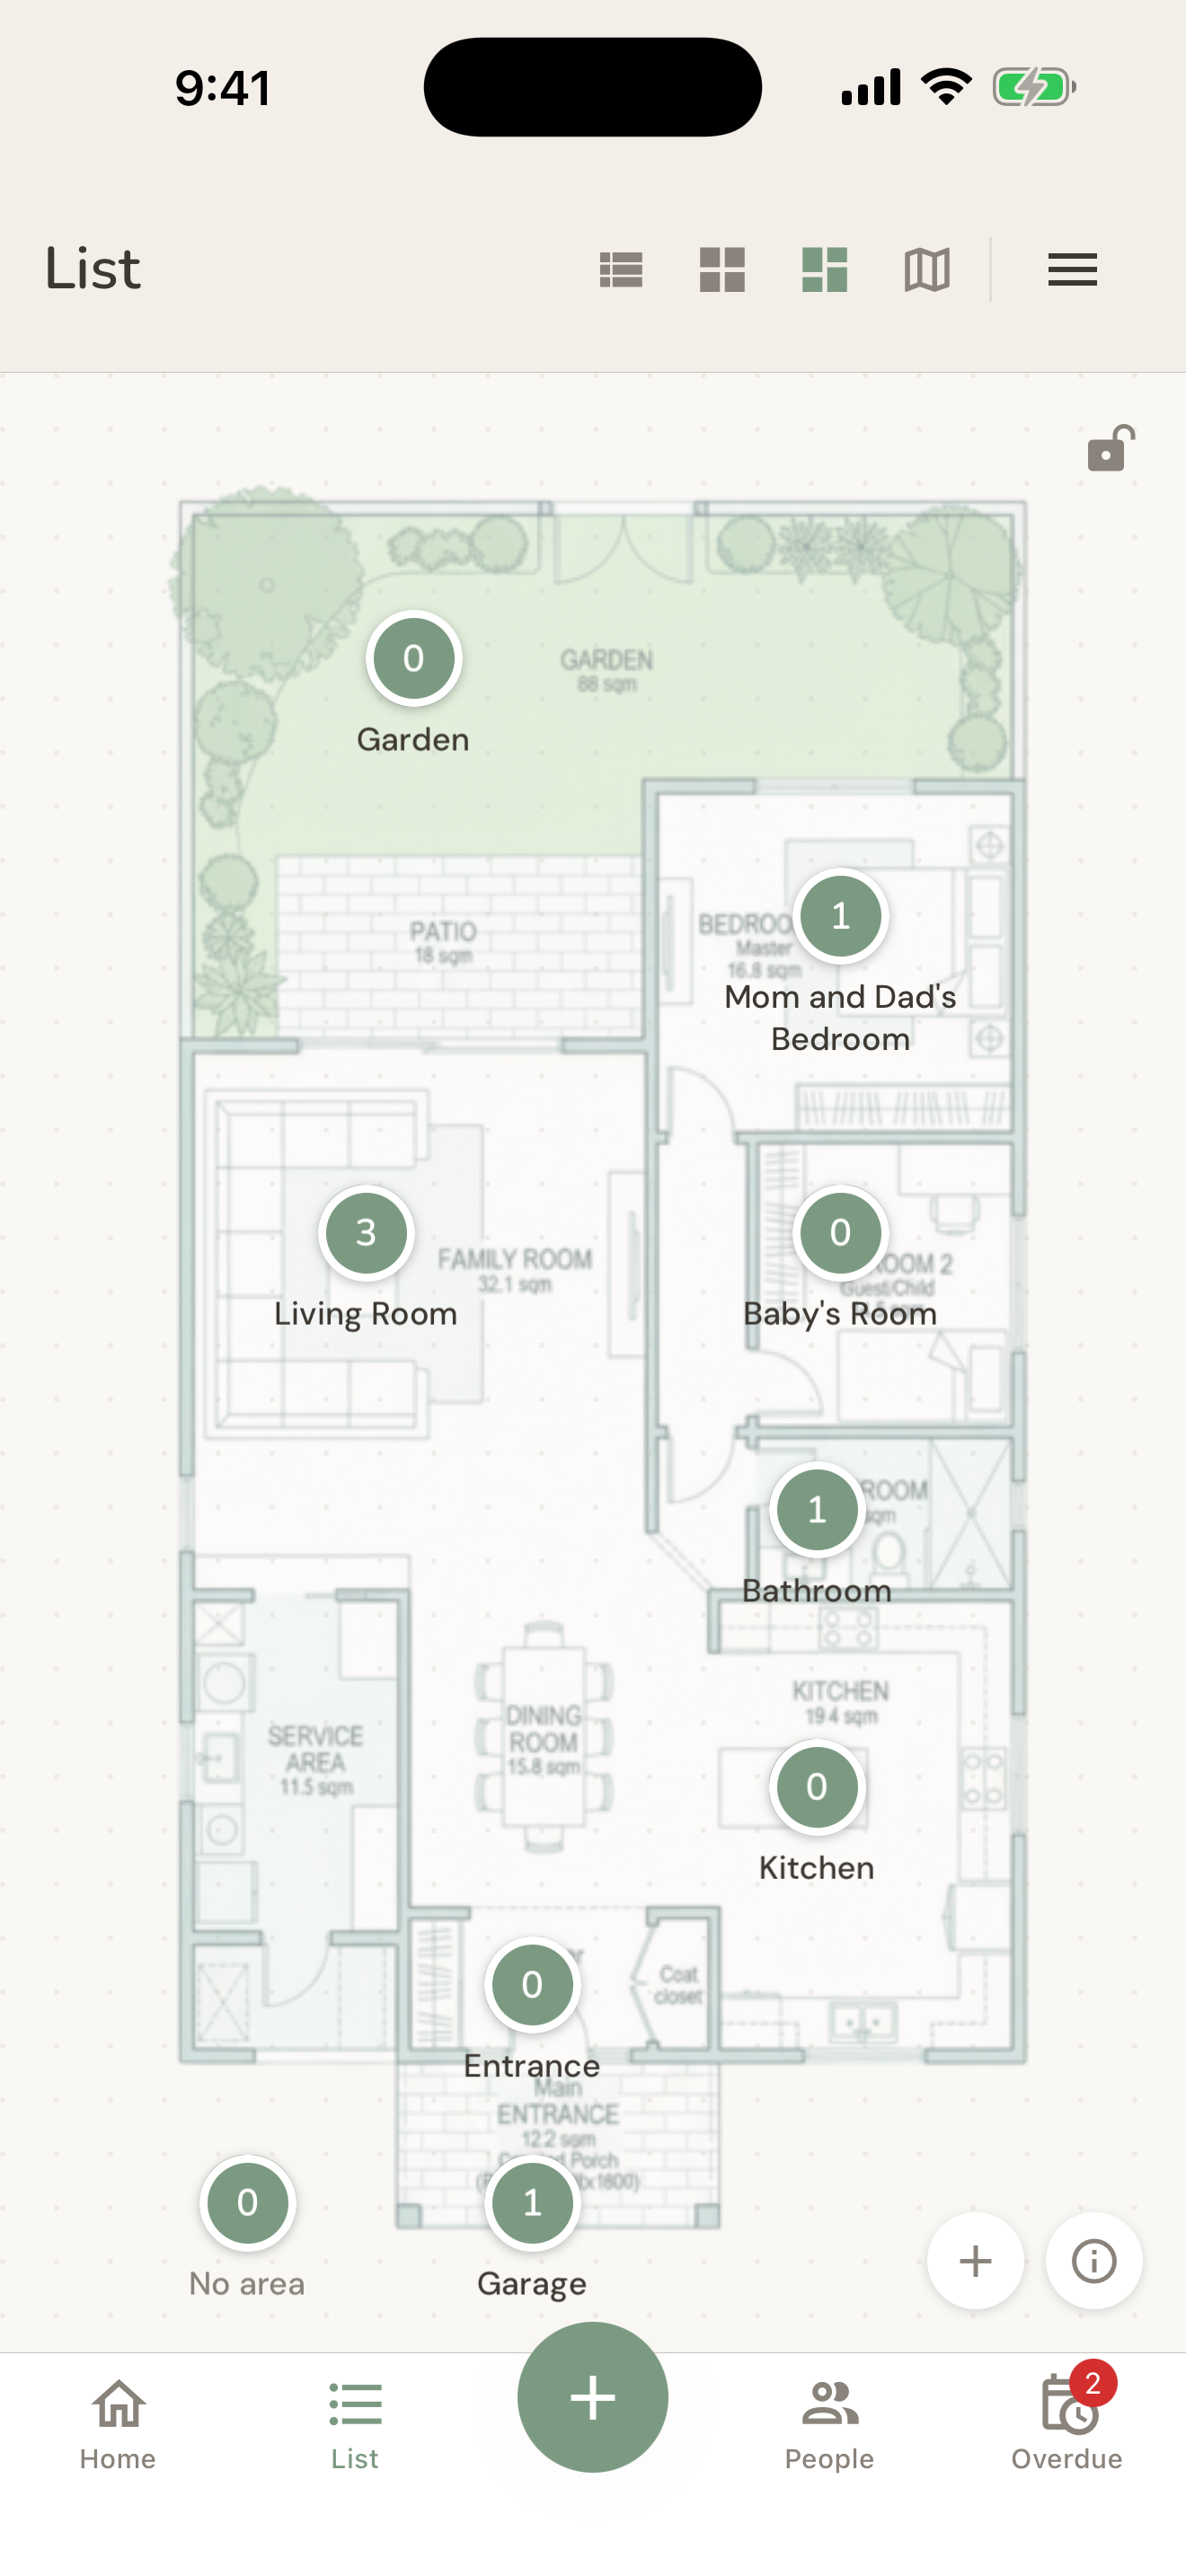
Off by default: turn on ☰ menu → Options → Zone View first — then the floor plan appears on your List tab.
You can upload your own floor plan image directly from the Areas view in the List tab — open the menu near the floor plan to choose an image from your gallery, take a photo of one, swap it, or remove it. Any image works — a hand-drawn sketch, a scanned blueprint, or a photo of the building's layout document.
Floor plan tip: The bubbles are positioned based on your area assignments, not GPS. Make sure each item has an area set so it shows up correctly on the floor plan.
Map view
The map view shows items pinned at the GPS coordinates captured when you logged each issue. This is most useful when you manage multiple physical locations or properties spread across a city.
GPS coordinates are captured silently when you create an item. You don't need to enable anything — they're captured automatically as long as you've granted location permission to the app.
People view
The People tab shows all your assignees and their current status. For each person you can see: total open items, how many days ago the oldest item was created, and how many items they've completed.
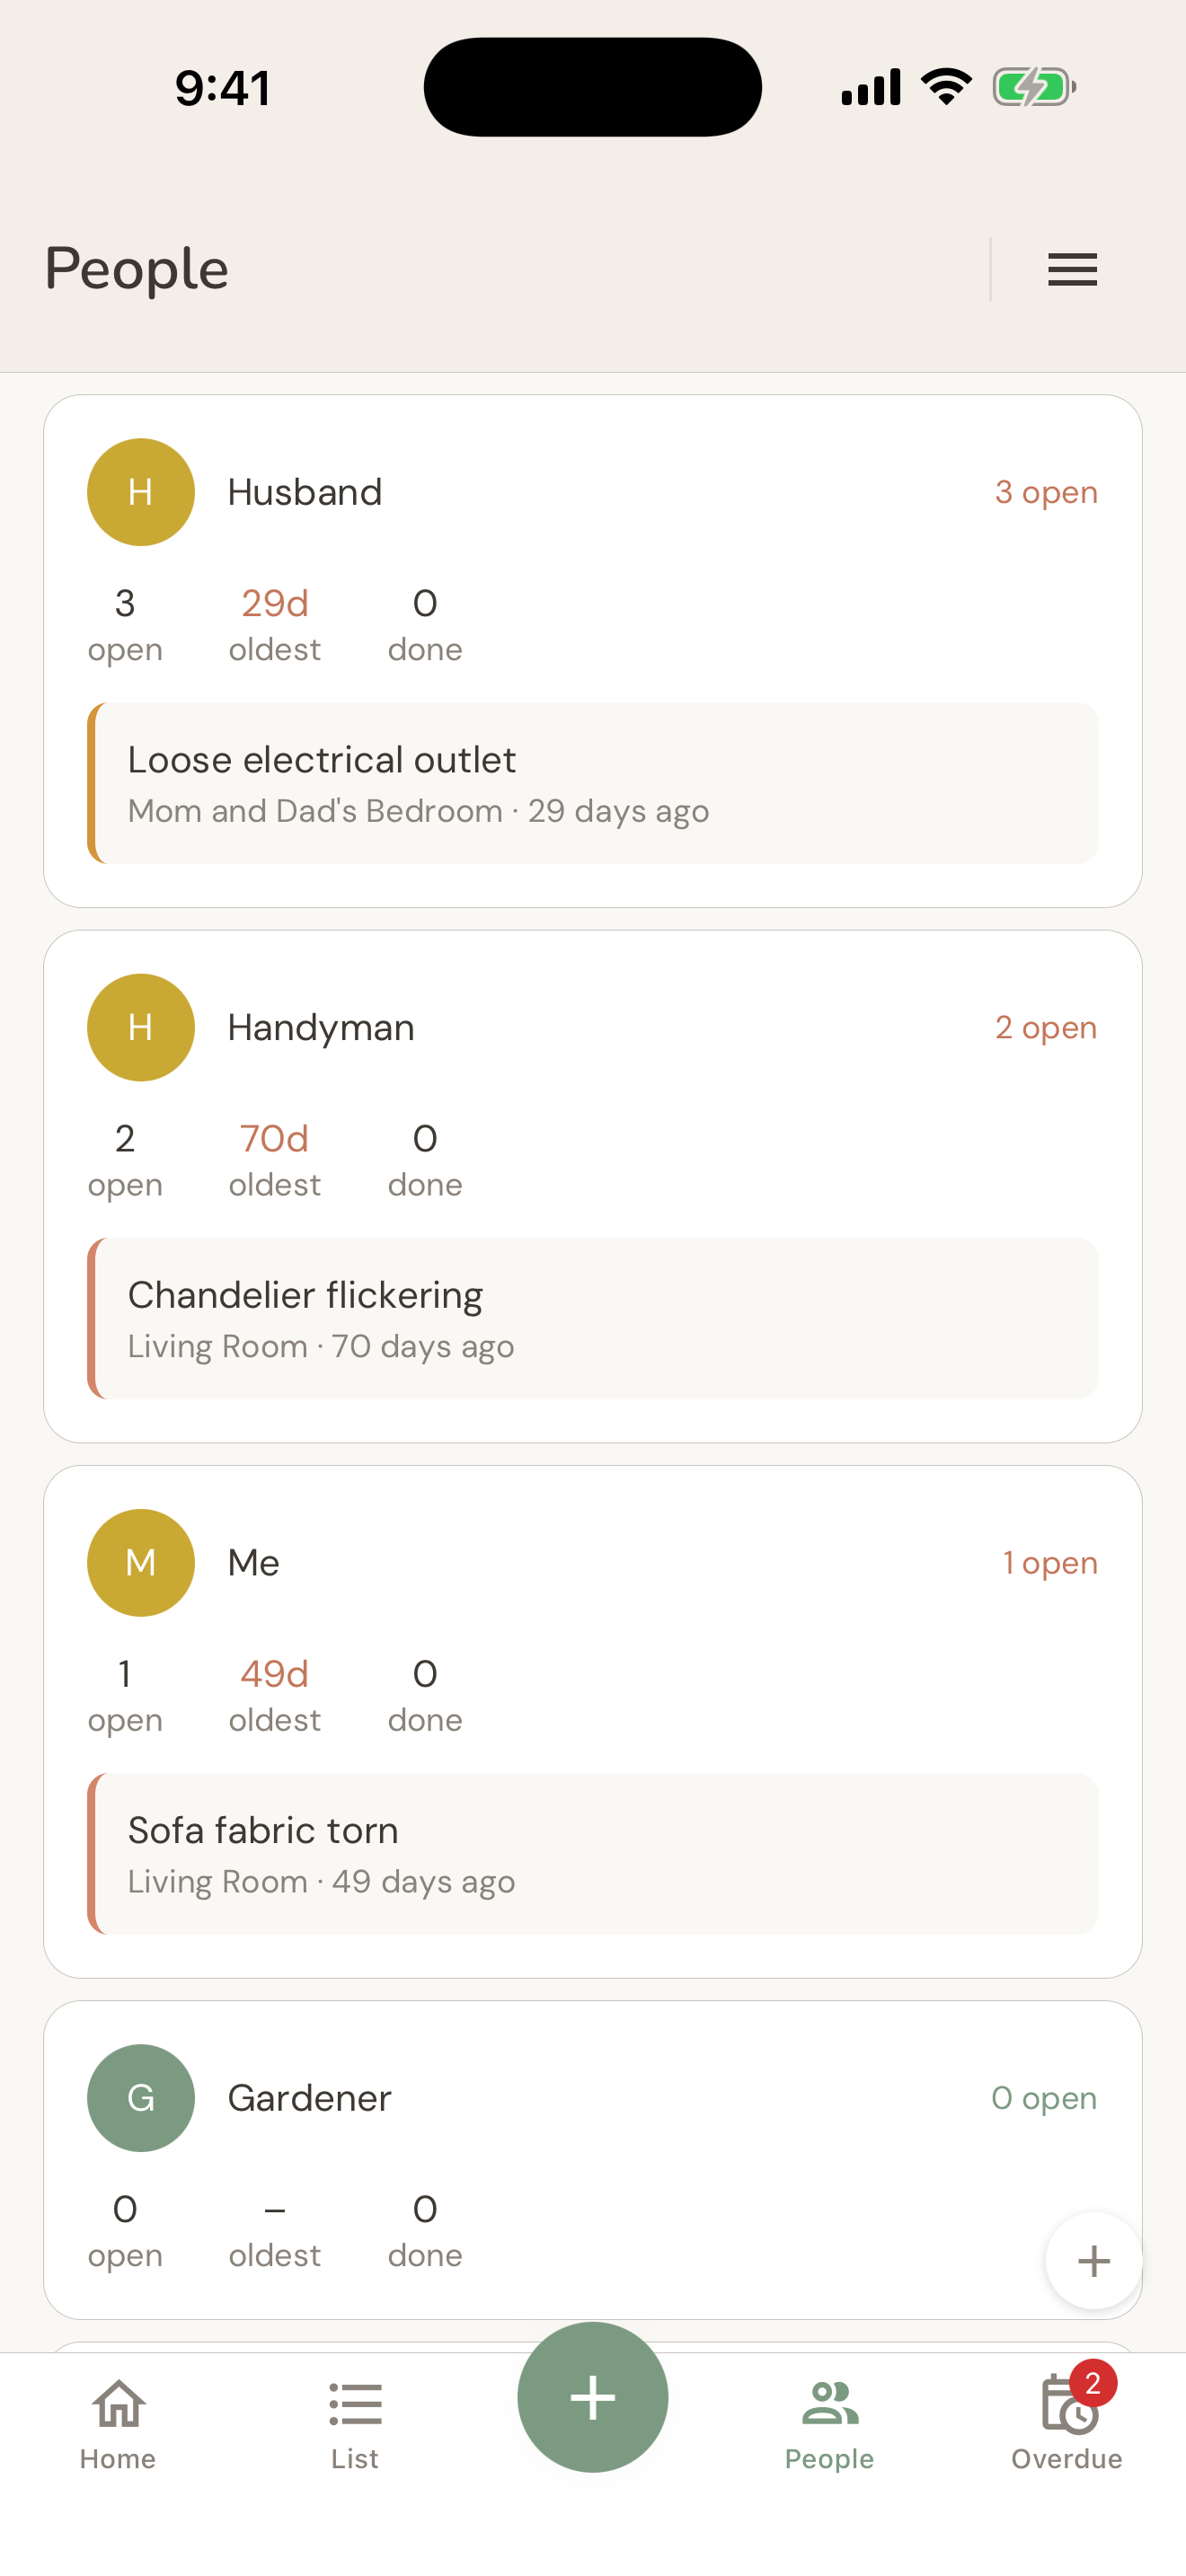
The oldest item for each person is shown as a preview — this is the "quiet issue that keeps getting pushed back." The terracotta color on the oldest-days counter is a gentle flag that something is aging.
Tap any person to see their filtered item list. From there you can share, bulk-update, or review their work before a contractor visit.
Managing properties
Meu Cantinho supports multiple properties — your home, your parents' house, an Airbnb rental, a school building. Each property has its own complete log, its own areas, and its own history. People you create are shared across properties — the same handyman can work on more than one.
Adding a property
Go to ☰ menu → Properties → + Add property. Give it a name and optionally an address. The name is what appears on the home screen selector.
Free plan and Pro
One property is free forever — no time limit. Adding a second property is part of Pro ($29.99/year, with your first month free). If your Pro subscription ever ends, you choose one property to keep fully editable; the rest stay on your device — complete with photos and history — but become read-only until you subscribe again.
Archiving a property
Archived properties are hidden from the home screen selector but their data is fully preserved. You can view and restore archived properties from ☰ menu → Properties.
Property Detail
Tap the building icon in the home screen header to open the Property Detail screen. This is the summary view for a single property.
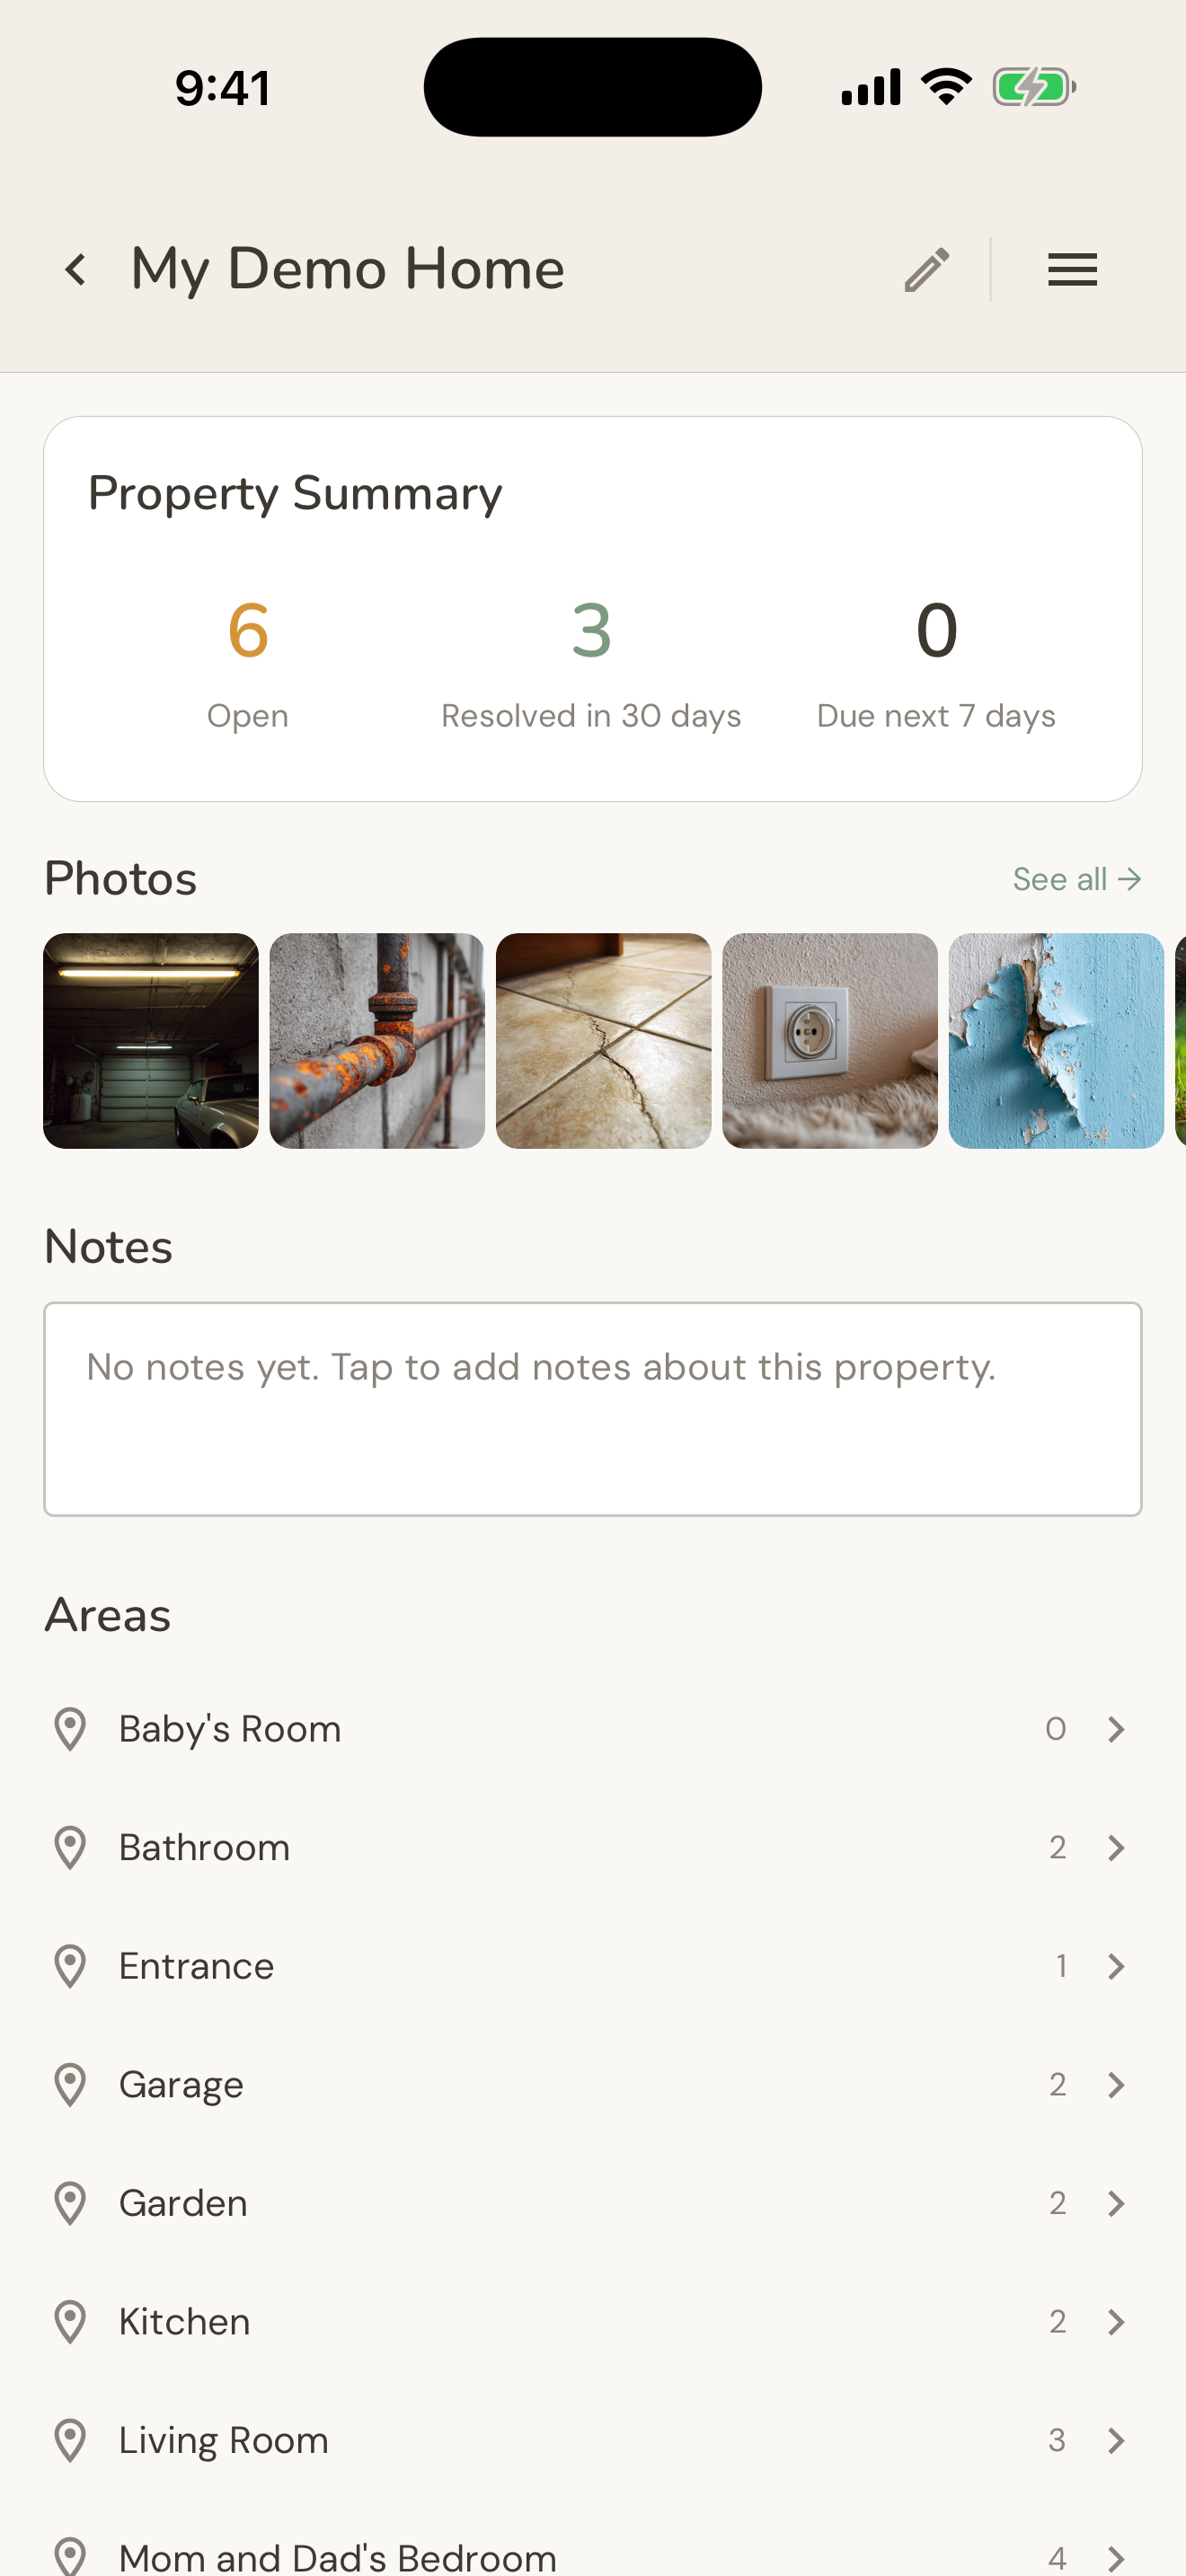
Property Summary card
Shows three numbers at a glance: open items, items resolved in the last 30 days, and items due in the next 7 days.
Photos gallery
A horizontal strip of the most recent photos from all items in this property. Tap See all → to open the full photo gallery with date headers.
Notes
A freeform text field for notes about the property — landlord contact info, alarm codes, annual maintenance dates. Tap to edit.
Areas list
All areas in the property with their open item counts. Tap any area to see its filtered item list.
Investments & costs
The Investments screen shows everything you've spent on a property, organized by month and by tag. Open it from the Statistics view (chart icon in the home screen header) or from the This month card on the home screen.
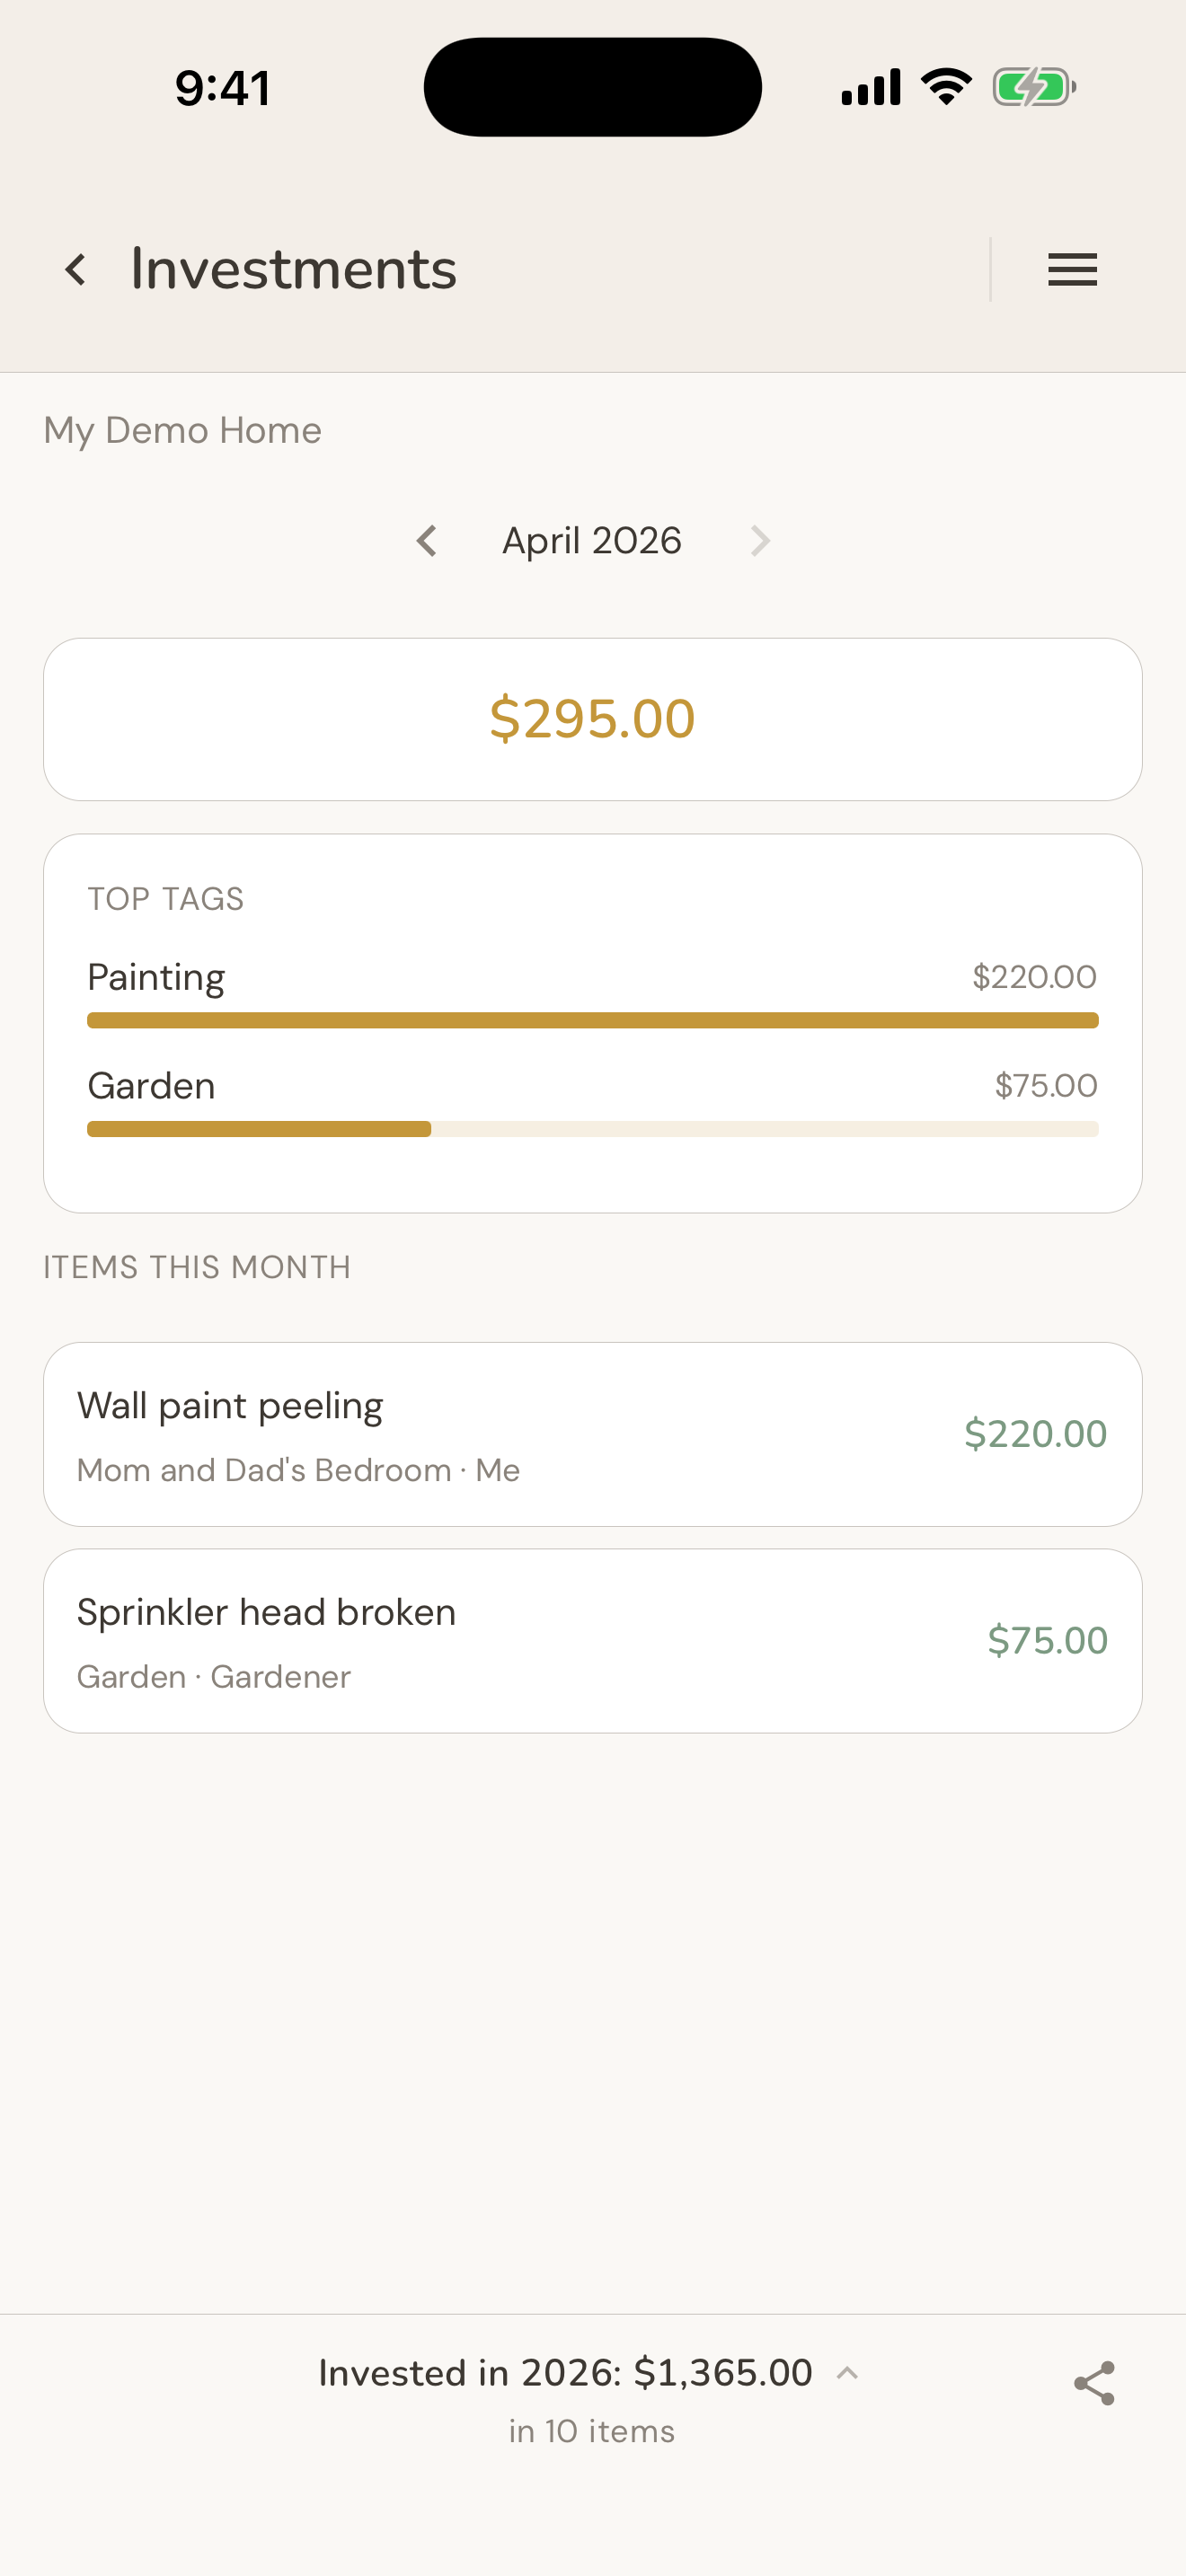
Month navigation
Use the left and right arrows to browse month by month. The total for the selected month is shown prominently. Scroll down to see the individual items that incurred costs that month.
Top tags
The bar chart shows your top spending categories for the selected month — useful for spotting patterns like "I'm spending a lot on Electrical recently."
Annual total
The bottom bar shows your total investment for the calendar year (January–December) and how many items contributed to it. Tap the share icon to send a formatted summary.
Logging a cost
Costs are logged on updates, not on items directly. When you add an update (e.g., "Contractor repaired the pipe"), include the cost in the cost field. It flows into the monthly and annual totals automatically.
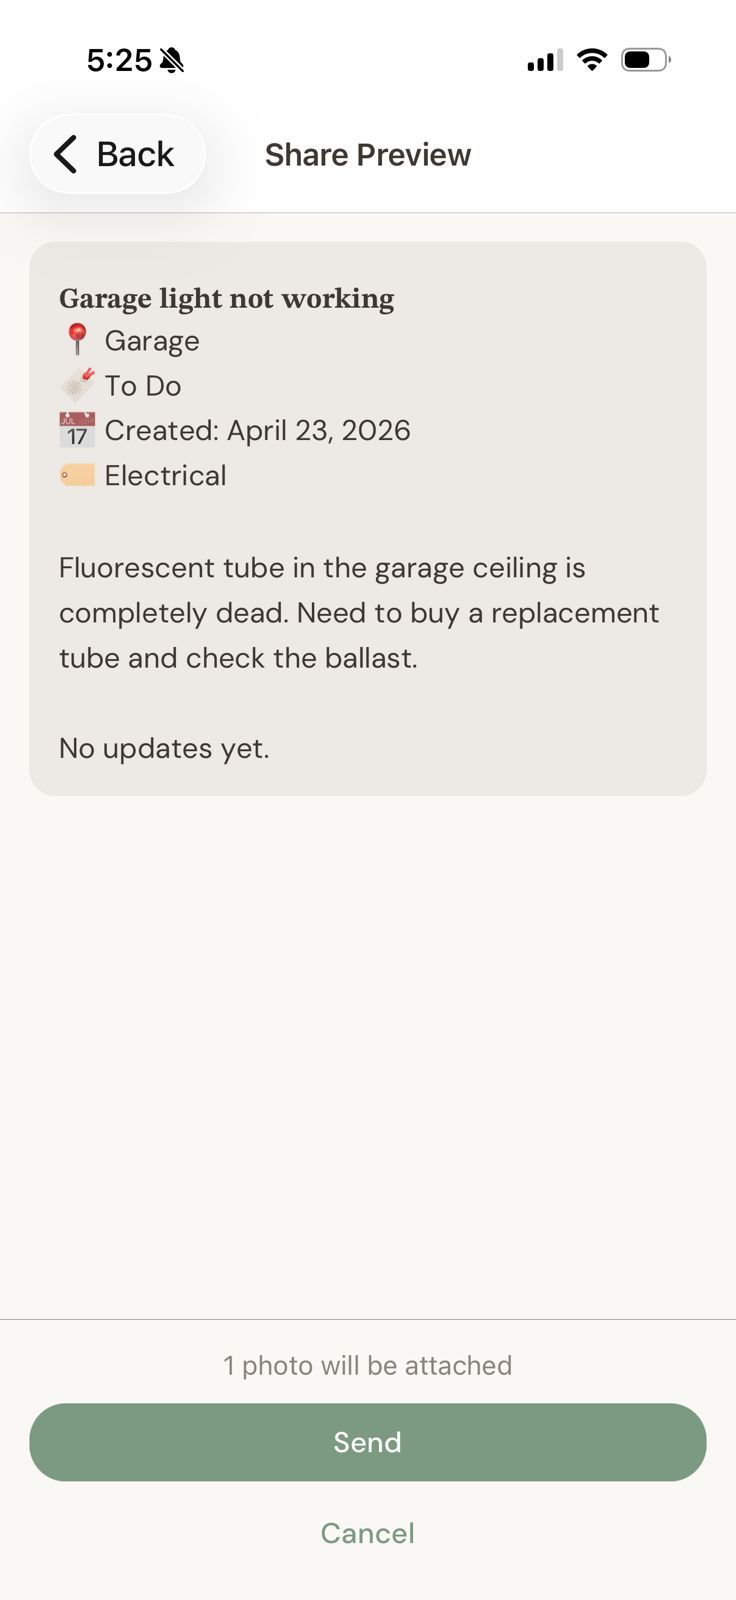
Sharing an issue
Tap the share icon on any item to generate a formatted brief that you can send via WhatsApp, iMessage, email, or any app on your phone.
What's included in the share
The shared summary is formatted to look professional in WhatsApp and email — no editing needed. The goal is that a contractor receives the share and has all the context they need without a follow-up call.
Annotating before sharing
Before sharing, open the item and tap the photo to annotate it — sketch a circle around the problem area, draw an arrow with a freehand stroke, or scribble a label. The annotation is embedded in the photo before it's shared.
Pro tip: Before a contractor visit, go to People → tap their name → you see only their items. Share each one individually. They arrive with a briefing and don't need to call you for context.
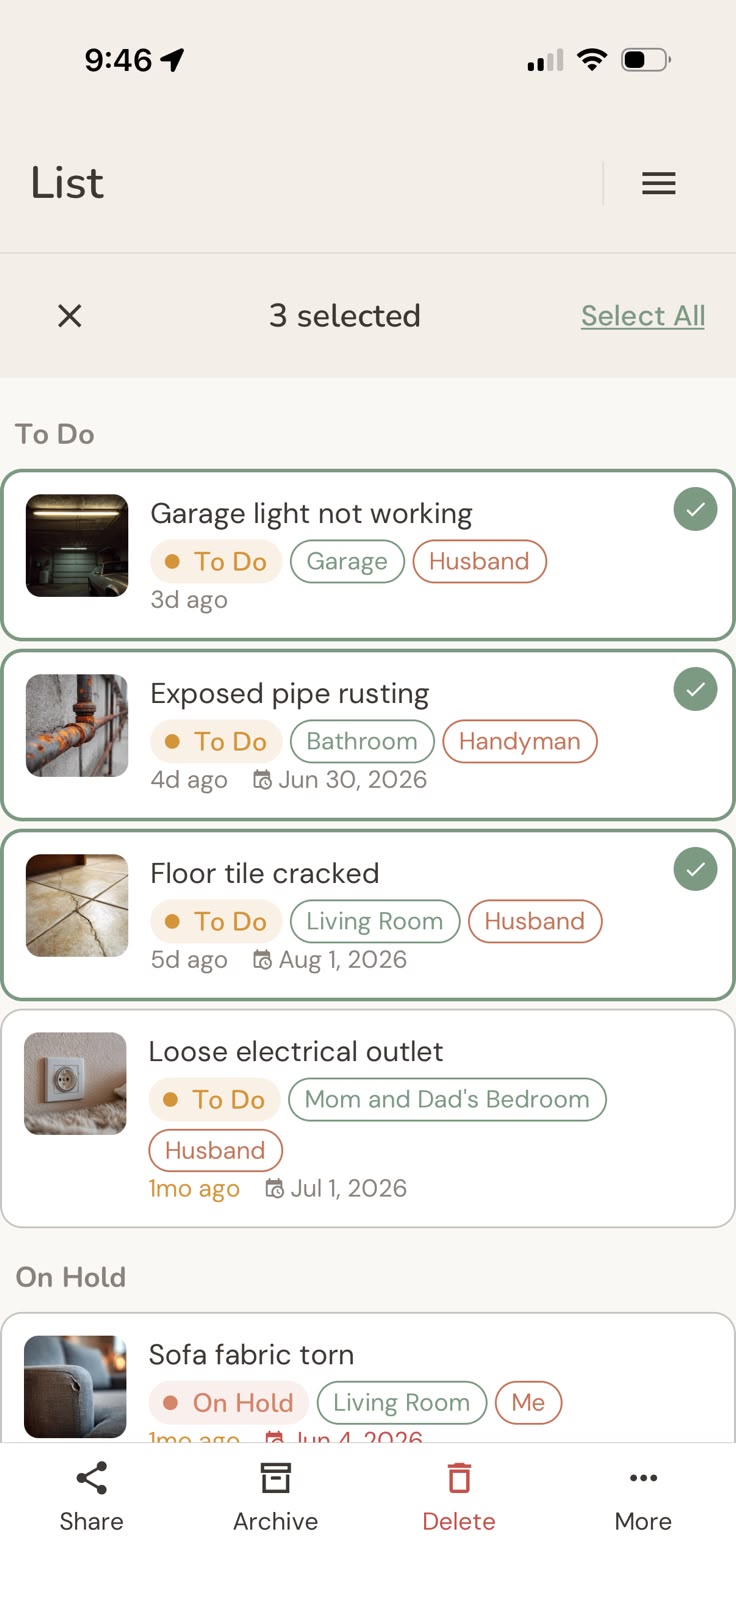
Bulk actions
Long-press any item in the list to enter bulk selection mode. Tap additional items to select them. A selection bar appears at the bottom with these actions:
| Action | What it does |
|---|---|
| Share | Generates a combined briefing for all selected items. |
| Archive | Moves all selected items to the archive. |
| Delete | Permanently deletes selected items and their photos. Irreversible. |
| More | Bulk status change, bulk area assignment, and bulk person (assignee) assignment. |
Vocabulary
Vocabulary is where you customize the options that appear when logging issues — your tags, areas, and assignees.
Access it from ☰ menu → Vocabulary.
Tags
Meu Cantinho comes with suggested tags (Plumbing, Electrical, Painting, Structure, etc.). Edit them, delete them, or add your own. Tags are shared across all your properties.
Areas
Areas are per-property. Each property can have its own room structure. Add, rename, and reorder areas from Vocabulary → Areas.
People
Create entries for everyone who might be responsible for maintenance at your properties — your husband, your handyman, your gardener, a property management company. People are shared across all properties.
App settings
App settings live under ☰ menu → Options.
| Setting | Description |
|---|---|
| Language | Changes the app interface language. English, Portuguese, and Spanish supported. |
| Currency | Sets the currency symbol used in the Investments view and cost fields. |
| Zone View | Enables the zone map (floor plan) on your list screen. |
| Notifications | Three quiet, optional reminders — see below. |
Notifications
| Notification | When it arrives |
|---|---|
| Target-date reminders | 9:00 AM the day before an item's target date. |
| Morning overdue digest | 8:00 AM summary of overdue items — silenced when everything is on track. |
| Re-engagement nudges | A gentle check-in when a property goes quiet. You choose the threshold: 14, 21, or 30 days. |
Storage & backup
All data — items, photos, voice notes, and updates — is stored locally on your iPhone. Nothing is sent to a server.
iCloud backup
Your iPhone's standard iCloud backup includes all Meu Cantinho data automatically, as long as iCloud Backup is enabled in your iPhone Settings. If you lose or replace your phone and restore from iCloud backup, Meu Cantinho and all your data will be restored.
Keeping storage light
Photos and videos are compressed automatically when you capture them, so the app stays small — a typical property with 50 items and photos uses roughly 100–150 MB. To free space, delete items you no longer need: deleting an item also removes its photos, videos, and voice notes from your device.
You can check the app's total footprint anytime in iPhone Settings → General → iPhone Storage → Meu Cantinho.
Privacy & data
Meu Cantinho is designed around a simple principle: your data is yours.
- No account is required to use the app.
- No data is collected, transmitted, or analyzed by Meu Cantinho or Paper Sparrow.
- Photos and voice notes never leave your device unless you explicitly share them.
- GPS coordinates are stored locally alongside items. They are only shared if you share an item that includes location.
- The app uses iOS Data Protection — your data is encrypted by iOS while your phone is locked.
- Deleting items or photos in the app permanently removes them from your device. There are no hidden copies.
For the complete Privacy Policy, visit meucantinho.co/privacy.
Free vs. Pro
One property is free forever — no time limit, no account, and everything the app can do. Pro exists for one reason: caring for more than one place.
| Feature | Free | Pro |
|---|---|---|
| Properties | 1 | Unlimited |
| Items per property | Unlimited | Unlimited |
| Photos, videos & voice notes | Unlimited | Unlimited |
| Updates & cost tracking | ✓ | ✓ |
| All views (list, grid, floor plan, map) | ✓ | ✓ |
| Sharing | ✓ | ✓ |
| People view | ✓ | ✓ |
| Notifications | ✓ | ✓ |
Pricing
Pro — Annual
$29.99 / year
1 month free, then $29.99/year, cancel anytime.
Free
$0 — forever
One property, every feature, no time limit.
1 month free: When you subscribe to Pro, your first month is free — billing through Apple starts only after it ends, and you can cancel anytime from Settings. The sample home doesn't count toward your free property.
If your subscription ends
If your Pro subscription ends, your properties are never deleted. You choose one property to keep fully editable — you have a 7-day window to pick. The rest become read-only: you can still view and share all your history, photos, and updates, but you can't add new items. Subscribe again at any time to restore full access immediately.
Frequently asked questions
Didn't find what you were looking for?
We read every message. Send us a question and we'll get back to you.
Send a message Visit our site